
Favaloro Instructions for Ordering/Sizing Frames


Steps for sizing and ordering your frame.
- Decide on your frame model (click here for information).
- Take your body measurements (instructions below on this web page). You may also find the instructions in the downloadable order forms/information packet (pdf).
- Complete the Favaloro online order form or the order form in the pdf information packet (requires either e-mail or fax capability).
- Once this form has been submitted the builder will determine if the measurements can be translated to the frame you have selected. A representative from Albabici will contact you as a follow up to discuss and/or confirm the data and your requested options.
- For the frame's colors and/or design, download the blank frame colors form (it may also be found in the downloadable order form/information packet). Decide on the frame colors (the colors and design may be hand drawn initially). Please note, however, that logos or intricate designs should be provided in a high resolution vector format. Again, if necessary a representative from Albabici will contact you as a follow up to discuss and/or confirm the data and your requested color options.
MEASUREMENTS
To have a frame exactly sized according to the anthropometric characteristics, we definitely need a correct methodology for measuring the subject. These measures are extremely critical; therefore they must be taken with the utmost care, even repeating the same measurement several times, if needed, to eliminate any doubt. Below are some basic instructions (refer to figures below):
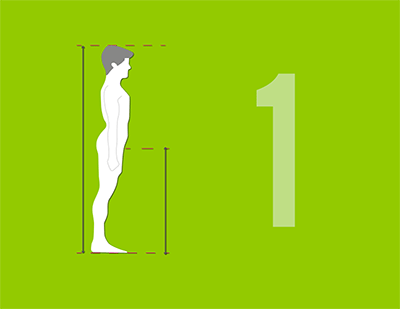
Image 1
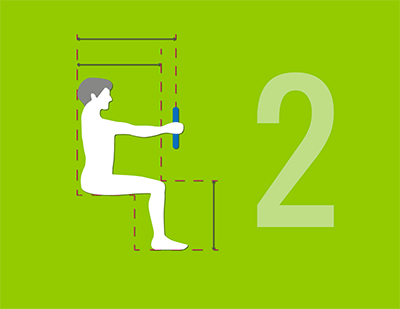
Image 2
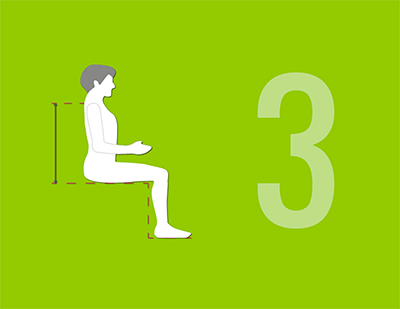
Image 3
HEIGHT (Image 1): The rider should be standing in an upright position, his back and shoulders in contact with a wall, without shoes and with feet parallel, slightly apart. The measurement needs to be taken with an appropriate set-square or a wide level pulled against the crotch.
INSEAM (Image 1): The rider must be in a well-erect position, with the back and shoulders resting on a vertical wall, in shorts, barefoot and slightly apart. The measure must be taken with a set-square as wide as possible.
ARM SIZE (Image 2): This measurement must be performed by keeping the rider in the position described above. He must hold a tube with the same diameter as the handlebar and stretch the arm horizontally without removing the shoulders from the wall; the
measure to take is that between the vertical wall and the center of the tube diameter.
THIGH LENGTH (Image 2): Seating in the same position adopted for the trunk measurements. The legs should form a 90 degree angle with the thighs horizontal and the tibias perpendicular. Place a level or a metal ruler against both kneecaps and measure the horizontal distances between the wall and both kneecaps.
Note: the two measurements could be slightly different.
TIBIA MEASURE (Image 2): In the same position described above, make sure that the tibia bone is in a vertical position; place a metal ruler or a level over the upper edge of each kneecaps and measure the vertical distances between the level and the floor. Note: the two measurements could be slightly different.
MEASURE OF THE TRUNK (Image 3): The rider must be seated on a stool chair, adjustable in height so that the femoral shafts are parallel to the floor, the back well erected so as to rest the pelvis and the back against a vertical wall, the shoulders in a natural position. For each side of the torso, measure the vertical distances between the stool seat and the protrusion of the clavicle at the end of each shoulder (use a set square placed against the wall and the shoulder).
Note: the two measurements could be slightly different.
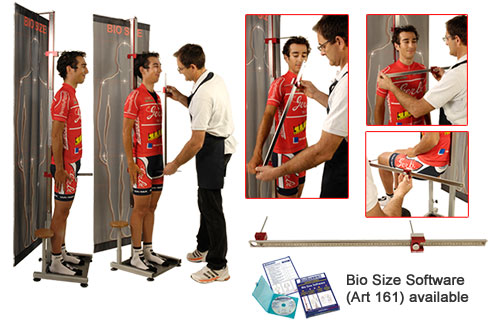
**These measurements can be taken with the Art.160 BioSize.
- PROVIDE YOUR SHOE SIZE (US Sizing)
- HEIGHT
- WEIGHT
- TYPE OF USE OF THE FRAME
- LEVEL OF HANDLING SKILLS
- FLEXIBILITY
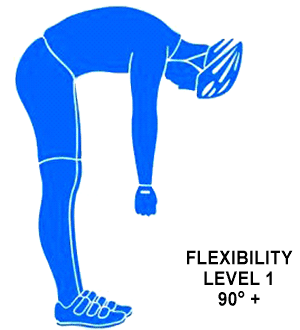
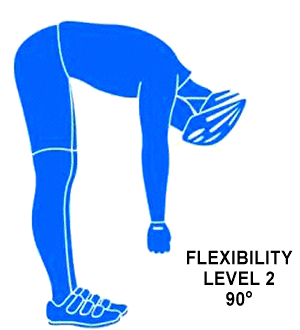
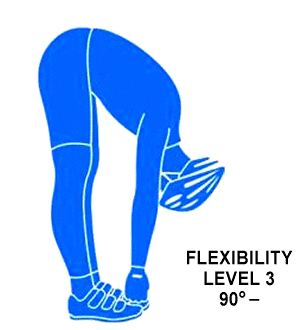
MEASURING FLEXIBILITY LEVEL
Select the level from the figures below that most closely indicates your level of flexibility.
ONLINE ORDER FORM - Click here for the Favaloro online frame orderform
PROVIDE YOUR COLOR SCHEME

Download the blank frame colors form (it may be found on page 5 in the downloadable order form in the pdf information packet.
Decide on the frame colors (the colors and design may be hand drawn initially).
Please note, however, that logos or intricate designs should be provided in a high resolution vector format.
Again, if necessary a representative from Albabici will contact you as a follow up to discuss and/or confirm the data and your requested color options.